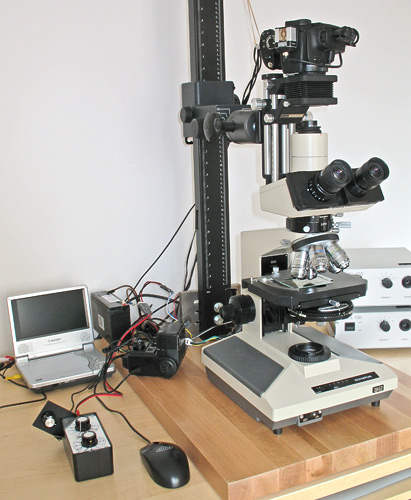
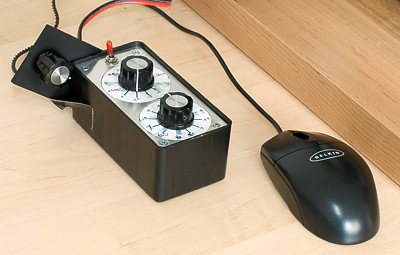
On the right is my current working desktop (although it is certainly tidier in this picture than at any time I am actually working). The camera is attached to one of the same stands used in my initial installation. The bellows is the same Vivitar unit. In the lower left is the electronic flash power control. An additional potentiometer has been added to that control to allow me to adjust the brightness level of the LED that provides continuous viewing light for my electronic flash “module”. As before, the camera release has been wired into the mouse seen at lower left. I find the very light touch and short travel of the switches on the mouse very comfortable for photomicrography. The video-out from the camera is now connected to a small LCD screen seen above the flash control.. Much smaller than the TV used before, it still provides the information I want while shooting.... namely a view of the exposure histogram, a look at the composition, and display of camera menus. The microscope is different from my initial set-up. I am now using an Olympus BHS stand. The change was made when I was fortunate to locate a complete microscope set up for transmitted DIC (differential interference contrast) that I felt was reasonably priced. (I‘m not sure “reasonably priced” and ‘DIC” can really be used together in the same sentence!) Since I had been using primarily Olympus LB series objectives for some time, it was an easy and logical transition. I have been very pleased with this microscope, as well as the performance of the Olympus Plan Apo objectives, and don’t see myself moving on to anything else anytime soon.
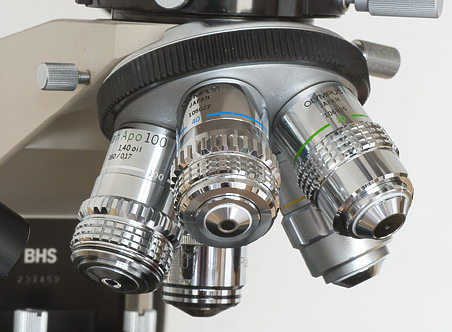
To the left is a removable nosepiece outfitted with a set of objectives I use frequently. My previous stands did not have removable nosepieces, and I find it much nicer, faster and safer than constantly unscrewing and screwing in objectives. Primarily, I switch between a nosepiece containing objectives used for low magnification work and one (as seen at left) for subjects that need medium to higher magnifications.
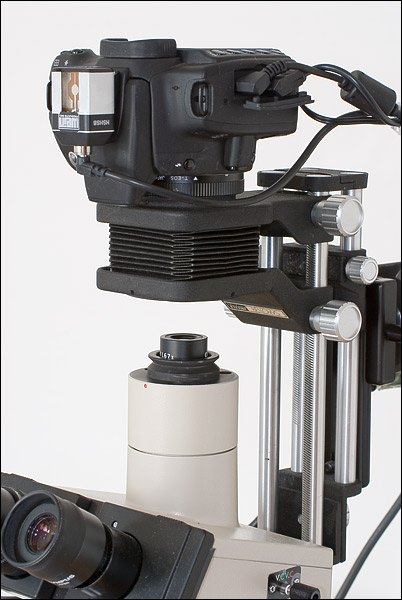
The camera and bellows is used as before. The front standard is lowered over the Olympus NFK projection eyepiece and mounting flange seen at right. There is no contact between the two, effectively isolating the microscope from any vibration that might be induced by the shutter or mirror of the SLR. Tests have confirmed that this procedure is also effective at keeping room light from reaching the camera sensor. The rear standard can be used to change the vertical position of the camera. An 8Mp Canon 350D (Digital Rebel XT) has replaced the original Canon 10D. Unlike my older microscopes, the Olympus trinocular tube is not adjustable up and down. In order to make the camera parfocal with the view through the eyepieces, the camera body position is “roughed in” with the elevation of the copy stand, and then “fine tuned” by slight adjustment of rear bellows standard with the camera attached. A detailed description of the procedure I use can be found here.
A Wein “safe-sync” is used to insure that the sync voltage of the older Vivitar 283 flash does not damage the camera electronics. The two cables seen attached to the camera side are the “video-out” and the shutter release. The camera battery has been replaced with a Canon AC power supply.
A Wein “safe-
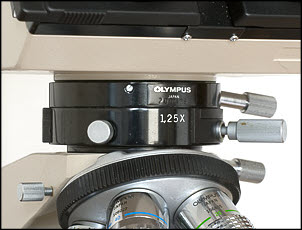
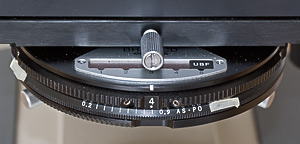
On the left are the two key components for the DIC illumination. The upper intermediate piece contains the analyzer and slider (Olympus BH2-NA Nomarski DIC intermediate tube). Since this microscope uses a “finite” 160mm tube length optical system, the intermediate piece has some additional optics to correct for the increase in tube length. In doing so, this piece adds a magnification factor of 1.25X. For some work, this caused the resulting magnification on the camera sensor to be a little too high (cropping too much of the view seen through the eyepieces) when I used the Olympus NFK 2.5X photo-eyepiece. This was resolved by finally tracking down an Olympus NFK 1.67X photo-eyepiece.
Also on the left you can see the DIC condenser (Olympus BH2-UCD Universal Condenser). When the cover is removed, it provides access to 5 circular positions in the rotating turret. This is where the various Nomarski prisms are placed for DIC (or Phase Contrast rings if that type of illumination is to be used). Incorporated into the condenser is a rotating polarizer. This is required for DIC, and it can also be used with an upper polarizer for “crossed-polarization”.
Also on the left you can see the DIC condenser (Olympus BH2-
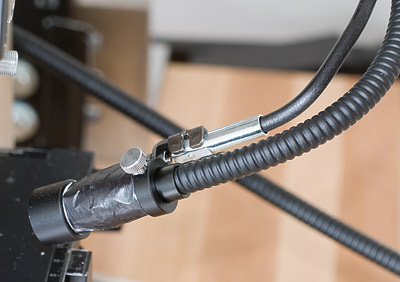
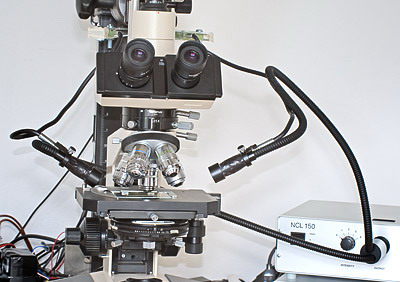
For low magnification photography of opaque subjects, some of the light I use is provided by fiber optic illuminators. The light guides I use are fairly long and are not self supporting, so the focusing lenses have been attached to 16” Lowel Flexi-shafts. The Flexi-shafts are mounted to a large clamp that is attached to the copy stand which holds the camera. These wire shafts are bendable in any direction (but fairly strong and stiff) so I can position the ends of the light guides as desired. It is also easy to bend them back, completely out of the way if they are not going to be used. If desired, the clamp with light guides can be quickly removed completely (as was done for the top picture on this page).
The primary method I had previously used for electronic flash could not be used with the BHS stand. In addition, DIC illumination, incorporating two polarizers, can really “soak” up the light! A brighter and more efficient method was needed. Fortunately, the BHS lamp module with collector optics is readily removable as a single unit. I located a second 100 watt lighting module and made the modifications illustrated below.
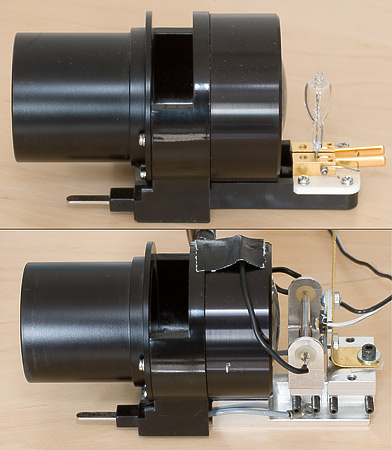
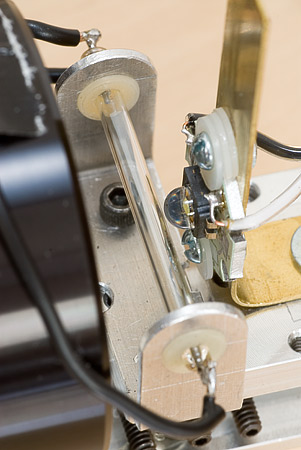
In the photo to the left you can see the “stock” 100 watt lamp module at the top. Below that a module that has been modified. A flash tube is now positioned in the same location formerly occupied by the lamp filament. Directly behind the flash tube is a Luxeon K2 white LED. The picture directly below provides a closer look at the modification. The flash tube was removed from the Vivitar 283 flash unit and attached to a bracket on a platform that can be adjusted up/down and forward/back. The LED is mounted to a piece of brass that is attached to a different adjustable platform..
PLEASE NOTE CAREFULLY!
Great caution must be exercised if any electronic flash unit is disassembled. The capacitors that hold the electrical charge for the flash present a very significant shock hazard. They must be properly and fully discharged. Don’t think that these small battery powered units can’t hurt you. I have and use the full repair manual for the Vivitar 283, and it explains the dangers and the proper procedures for working with these units.
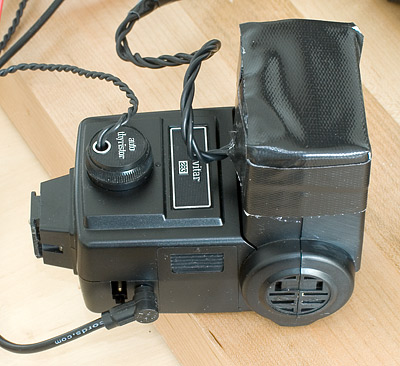
The flash unit itself has the “face” sealed off around the wires that run to the flash tube. At the time I am writing this, the completed “module” has only been used for a few months. Time will tell if any further modification is needed. The flash illumination is very bright and even, and the LED illumination level is adequate even with DIC.
So as we enter the spring of 2007, this page provides a summary of my current hardware, and how it is set up. When compared to “My initial DSLR setup” the microscope and flash implementation are different, but the essential methods of operation are the same. Be sure to visit http://www.krebsmicro.com and take a look at the galleries. I occasionally add pages, files, and “papers” that I think might be helpful to other microscopists, especially those incorporating DSLRs for photomicrography.
This page is essentially an update to one written at the beginning of 2005. That page, which gave an overview of my initial setup for photomicrography can be found here. While much has been retained over the past two years, there have been some changes discussed here that may be of some interest and help to others.
March 23, 2007
The additional thoughts below were added on October 9, 2007
Electronic Flash
I have now used the electronic flash set-
The LED aspect is not perfect. My intention was that the LED would provide the “viewing” illumination, and the flash tube the “exposure” illumination. The K2 LED I am using has sufficient light output for this purpose, but its angle of illumination is slightly too narrow for the Olympus collector lens at the rear of the light module. As a result, there is an obvious illumination fall-
The flash levels used are almost always considerably less than full power. As a result, high capacity rechargeable NiMH AA batteries have been perfectly adequate. Recycle times are very short, and I can work for many hours and take hundreds of photographs without needing to recharge or replace the batteries. With these flash units there is the option for other power sources, but it has not been necessary to look beyond the AA’s.
DIC
Some Olympus users might wonder about my use of S Plan Apo objectives for DIC (Differential Interference Contrast) on the Olympus BHS. I had these objectives before getting DIC capability, so I was concerned if I could use them for DIC. The objectives recommended by Olympus for DIC were either the S Plan Achromats, or (with the correct condenser and prism) the D Plan Apo objectives.
(Since DIC relies on the use of polarized light, one concern is using objectives that are “non-
I have the BH2-
For 10x objectives I compared the following:
10x S Plan Achromat with the proper Nomarski prism (UNP10)
10x D Plan Apo UV with correct prism (UNPD10)
10x S Plan Apo with the prism designated for the 10X D Plan Apo (UNPD10)
Looking at the images, I preferred the results obtained with the S Plan Apo.
For 20x objectives I compared the following:
20x D Plan Apo UV with the proper prism (UNPD20)
20x S Plan Apo with the prism designated for the 20x D Plan Apo (UNPD20)
Here too, I preferred the results obtained with the S Plan Apo.
For 40x objectives I compared the following:
40x S Plan Achromat with the proper prism (UNP40)
40x S Plan Apo with the prism designated for the 40x D Plan Apo (UNPD40)
Once again, I preferred the S Plan Apo results.
Unfortunately I have still not located the correct prism for the 100x... the UNP100 (the same prism was used for both the S Plan Achromat and the D Plan Apo). I have found that the 100x S Plan Apo gives nice results using the 40x prism, but I have no way of knowing how it might be different with a UNP100. (Anybody out there have one they would like to sell?!?)
I also cannot say whether I was just “lucky” with my particular objectives, or if it is generally OK to use S Plan Apos with the UCD condenser and the Nomarski prisms designated for the D Plan Apo series.